
Your roof doesn’t suddenly decide to fail at a polite moment. It happens after a storm, on a busy work week, or when you’re finally starting to budget for something fun. If you’re staring at missing shingles or a leak that whispers “It’s time,” you’re probably wondering what to expect during a roof replacement, and how big a disruption it really is.
Good news: roof replacement isn’t mysterious. It follows a predictable process. Homeowners across Metro Atlanta go through it every day, and when you work with the right roofing contractor, it’s far smoother than you might think.
Your Roof Replacement Roadmap
- A roof replacement typically takes one to two days, depending on the size and materials used.
- Your roofing contractor will guide you through the installation and cleanup process.
- Signs you need a new roof include leaks, missing shingles, sagging, or damage from storms.
- Residential roofing projects follow a predictable, step-by-step process, so surprises are kept to a minimum.
Step 1: The Initial Roof Inspection
Before anything else, a trustworthy roofing contractor needs to get eyes on your roof. That means climbing up there, checking the decking, flashing, shingles, ventilation, and problem spots.
What Happens During the Inspection
Your contractor will look for:
- Loose, cracked, or curling shingles
- Soft or spongy decking
- Water stains or signs of leaks
- Sagging areas
- Ventilation issues
- Storm damage specific to Metro Atlanta weather
Most inspections take less than an hour. This is also where you get your new roof estimate, which outlines roof replacement cost, materials, and timeline.
Pro Tip: If a contractor gives you a quote without ever getting on your roof, that’s a red flag. A replacement is too important to guess on.
Step 2: Choosing Materials That Can Handle Metro Atlanta Weather
Your roof is the first line of defense against everything Metro Atlanta throws at it, including summer heat, sudden downpours, fast-moving storms, and the kind of humidity that seems to hang in the air like a wet blanket. That means the materials you choose matter more than most homeowners realize.
When you work with a trusted roofing contractor, they’ll walk you through options that hold up to local weather patterns, resist high winds, and maintain their integrity through temperature swings.
The right choice helps your home stay cooler, prevents premature wear, and gives you more years of reliable protection. It should also match your home’s structure and long-term maintenance goals, so you get strength, longevity, and curb appeal all in one.
Step 3: Preparing Your Property
Once your installation is scheduled, the prep work begins. A good residential roofing team protects your home as much as they protect the crew.
What the Crew Sets Up
You should expect:
- Protective tarps over landscaping
- Covers for windows and AC units
- Driveway cleared for material delivery
- A dump trailer or dumpster is placed nearby
Your home becomes a mini jobsite for a day or two, and it might be a little noisy, but it should be well-orchestrated.
Step 4: Tear-Off: The Loudest, Fastest Part
If you’ve never seen an old roof come off, it’s impressive. Crews move quickly, stripping shingles and underlayment section by section.
Why Tear-Off Matters
A complete tear-off lets your roofing contractor spot:
- Rotten decking
- Hidden water damage
- Pest issues
- Loose nails or structural concerns
This step helps make sure that the new roof installation happens on a solid base.
Step 5: Decking Repairs and Reinforcement
Once the old roofing material is removed, the crew finally gets the clearest look at something homeowners rarely think about: the structural layer beneath your roof. This foundation is what supports everything above it, so the team takes their time here, checking, and then rechecking every section for strength, stability, and signs of hidden damage.
It’s quiet work compared to the tear-off, but it’s some of the most important work of the entire project.
What Gets Repaired
Depending on what the inspection reveals, the team may:
- Replace soft or rotting sections that could compromise the new roof
- Reinforce weak areas to improve long-term stability
- Update the drip edge to help direct water away from your home
- Prepare the surface for underlayment, ensuring a smooth, secure base
This step is crucial because roofing isn’t just about what you can see from the curb. A strong, healthy base will guarantee that your new system performs the way it should.
Even the highest-quality materials can’t overcome a weak or damaged foundation, so taking the time to correct these issues now sets your roof up for decades of protection.
Step 6: Underlayment and Waterproofing
Before shingles or metal ever go down, the waterproofing system is installed. This is what keeps Metro Atlanta’s heavy rain out of your home.
Typical Components Include
- Synthetic underlayment
- Ice and water shield in valleys
- Starter strips
- Updated flashing
It’s like putting down the foundation for the rest of the roof.
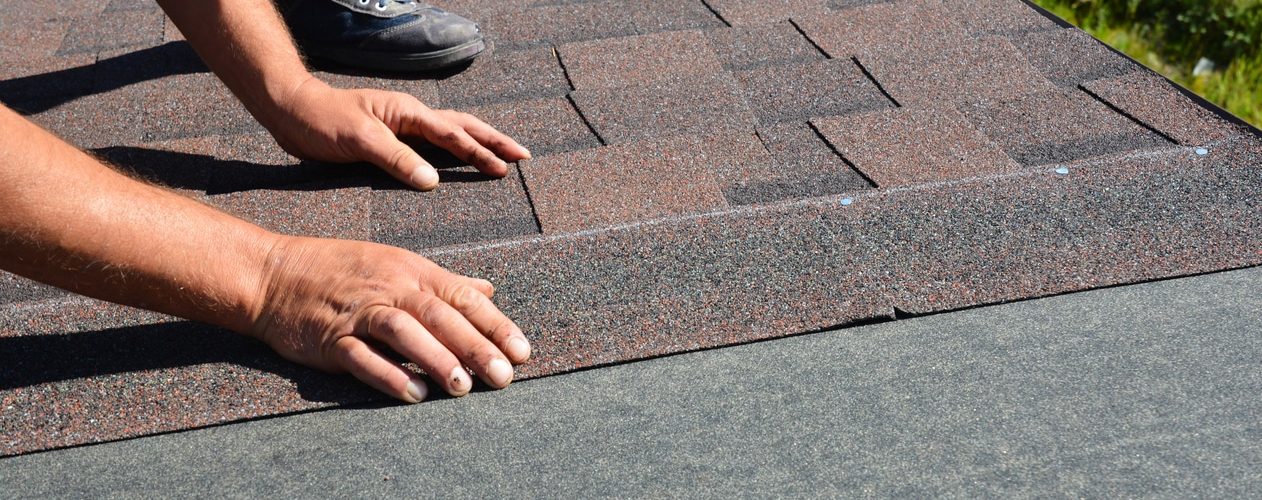
Step 7: Installing the New Roofing System
This is the part homeowners usually look forward to most. After the prep work, the tear-off, and the structural checks, your home finally begins to look like a roofed home again. The crew moves with a clear plan, installing each layer with precision so your new system is secure, weather-ready, and built to last.
What Installation Looks Like
The new roofing system is laid down in a structured, methodical process, ensuring every section is sealed, fastened, and protected exactly the way it should be. Each component is installed in a specific order so the whole system works together, handling everything from Georgia heat to sudden downpours.
While the main roofing layer takes center stage, the crew also focuses on the important supporting details, including:
- Updating ridge vents to keep your home properly ventilated
- Replacing pipe boots for a tight, waterproof seal around roof penetrations
- Refreshing chimney flashing to prevent future leaks
Most installations take half a day to a full day, depending on the size and structure of your home. By the time the crew wraps up this step, your roof has its shape, its strength, and its weather protection, and the finish line is in sight.
Step 8: Cleanup and Final Inspection
A good roofing contractor cleans up so well you shouldn’t find a single nail in the yard, which is especially important for kids, pets, and lawnmowers.
Clean-Up Checklist
Expect:
- Magnetic sweep for nails
- Shingle scraps removed
- Tarps taken down
- Gutters cleared
- Final walkthrough with your contractor
Ask questions. Get photos. This is the time to understand your roof’s condition and future maintenance needs.
How Long Does a Roof Replacement Take?
Most Metro Atlanta homes can be completed in one day. Larger or more complex roofs may require two. Only rare cases (heavy storm damage, major decking repairs) take longer.
A good contractor will give you a start time, end time, and daily plan so you’re never in the dark.
Final Thoughts for Homeowners
A roof replacement isn’t something you deal with often, but it’s one of the most important improvements you’ll ever make. Now that you know what to expect, the process becomes far less stressful. And with a clear timeline and the right materials, your home gets protection that lasts for decades.
Ready to Replace Your Roof in Metro Atlanta?
If you’re noticing damage, leaks, or signs your home needs a new roof, our team is here to help. Fortress Roofing delivers fast, reliable roof replacement and roof installation in Kennesaw and all throughout Metro Atlanta communities.
Get your free roof estimate today and protect your home with local experts who treat your roof like their own.